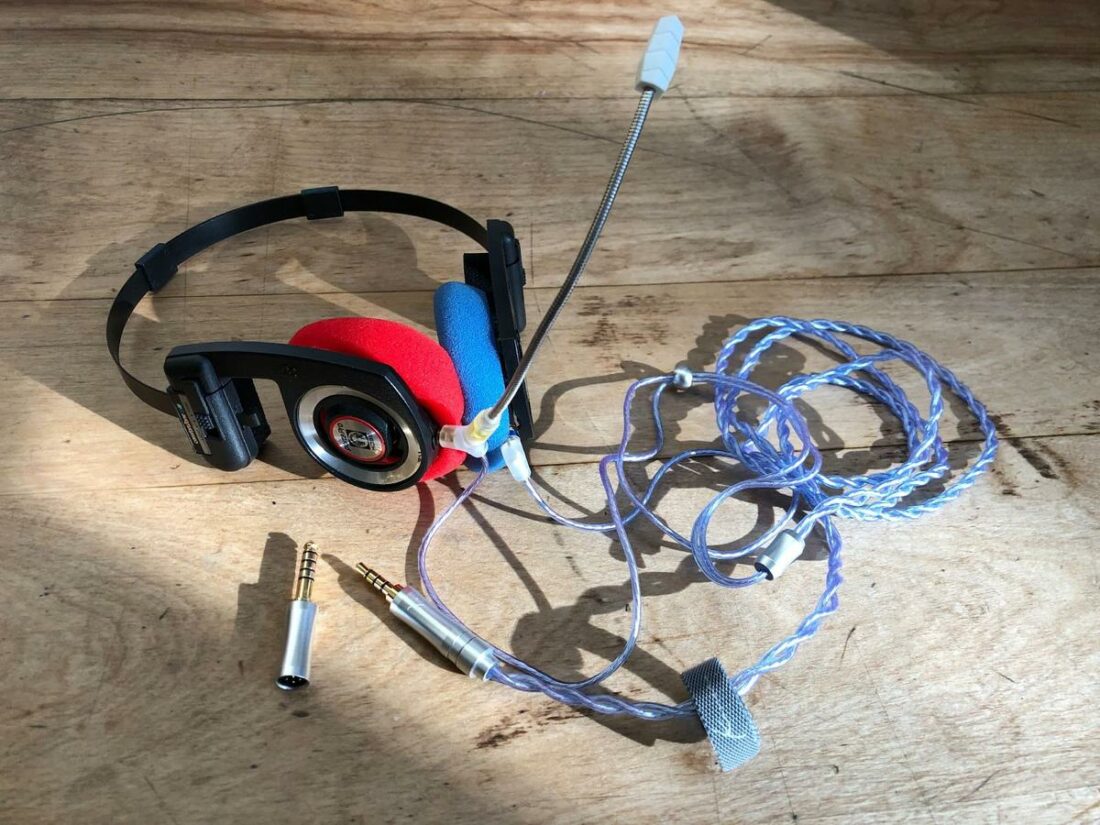
The renowned Koss Porta Pro headphones have been in production since 1984. This sort of longevity is almost unheard of in any technology market, let alone the fast-changing portable audio world. Not only are they still sold, but the Porta Pro are a perennial favorite of audio enthusiasts, often mentioned on forums. The Porta Pro certainly look distinctive and retro, featuring an exposed metal band, blue and black plastic, adjustable temple pads, and a unique folding shape. Regardless, they are defined by their groundbreaking 35mm, 60 Ohm drivers. This size and impedance are unusual by today’s standards, which typically feature larger and more efficient driver designs. This driver is the heart of many affordable headphone models in the Koss lineup. Regardless of any other factor, they deliver the most important thing of all: very good sound quality. Besides a few colorway changes, the current Porta Pro model remains almost entirely unchanged from the original. They still have the same headband, drivers, and (unfortunately) thin pads and attached cable. While I love the Porta Pro, two aspects could definitely use a refresh. The pads are too thin and compromise comfort and sound quality. The single-ended cable is non-removable and spindly, limiting how we can use the Porta Pro. Luckily, here’s where our DIY skills can come to the rescue.
Gaming Headset Modification Overview
Check out this article for more details on modifying Koss headphones. In the article, I tackled several different models of Koss headphones, tested and measured various cables and ear pads, and performed a few more in-depth modifications. After buying a pair of Porta Pros, the first thing to do is order a set of foam Yaxi pads. Available in a rainbow of colors (red, blue, black, orange, yellow, and purple), the Yaxi pads are a great way to personalize your headphones. More importantly, they improve the Porta Pro comfort and sound. Comfort is paramount in gaming headphones, and the ultralight (60g) Porta Pro fitted with thick, soft Yaxi pads can be worn for hours without discomfort. The next step is to tackle the cable.
Cable Modification
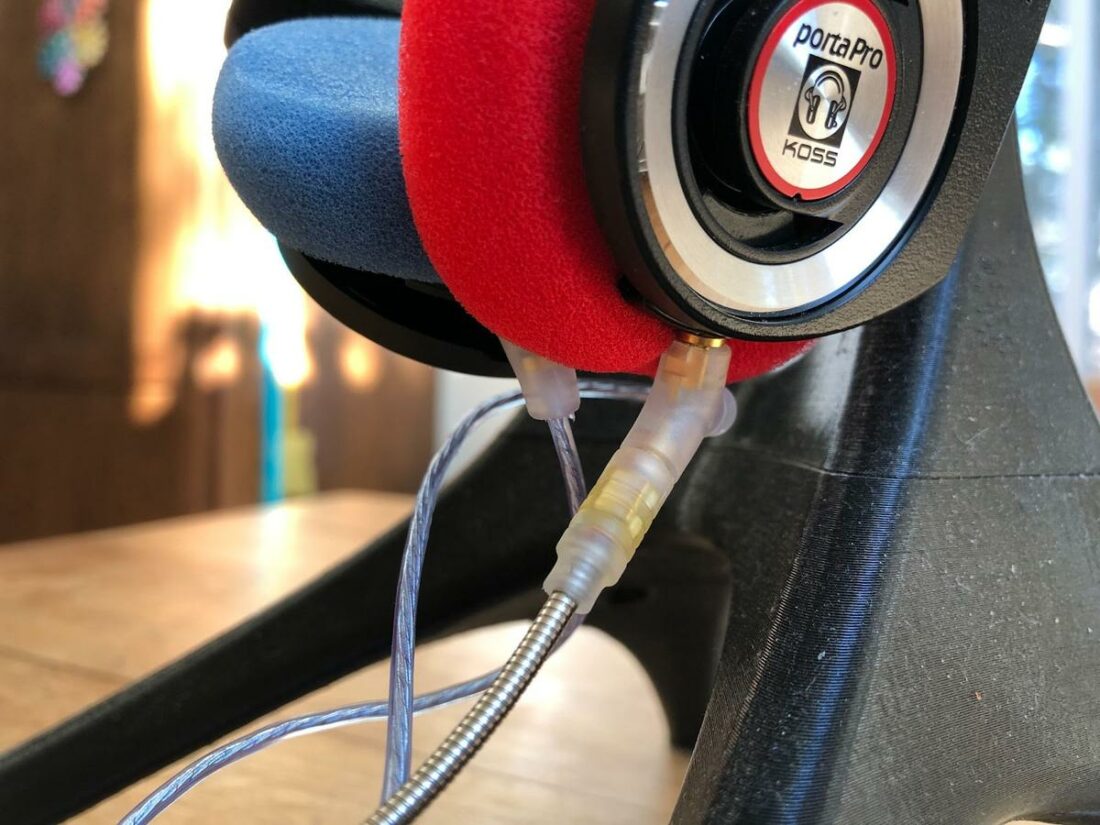
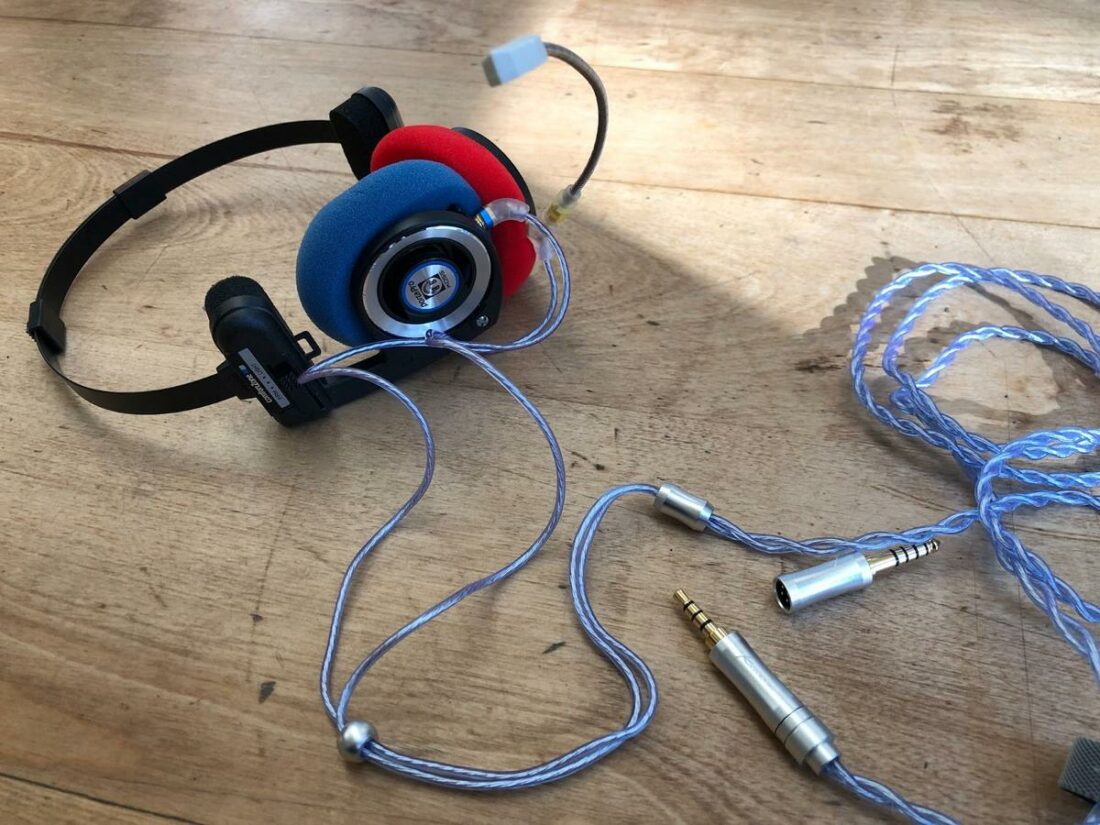
Changing the cable is necessary for using the Porta Pro as a gaming headset. Sure, Koss does offer an edition of the Porta Pro with an inline microphone, but gamers require something better. The Porta Pro cable is dual-entry and fixed to the ear cups, so it isn’t easily replaceable. It’s made of thin black plastic and is fairly easy to damage. We need to change the cable connection in the ear cups to add a new cable and boom microphone. The Porta Pro cups are just big enough to contain the 35mm driver, so there is simply no space for mini-XLR, 3.5mm, or even 2.5mm sockets. This means we need to consider IEM socket solutions. The tiny MMCX socket is sized small enough to fit and large enough to be worked with by the average DIY’er. Functionality aside, plenty of inexpensive cables provide aesthetic and tactile upgrades with attractive braids, colors, materials, etc. By swapping cables, you unlock the ability to use the Porta Pro with balanced sources, and yes, now you can add a boom microphone and transform them into a gaming headset.
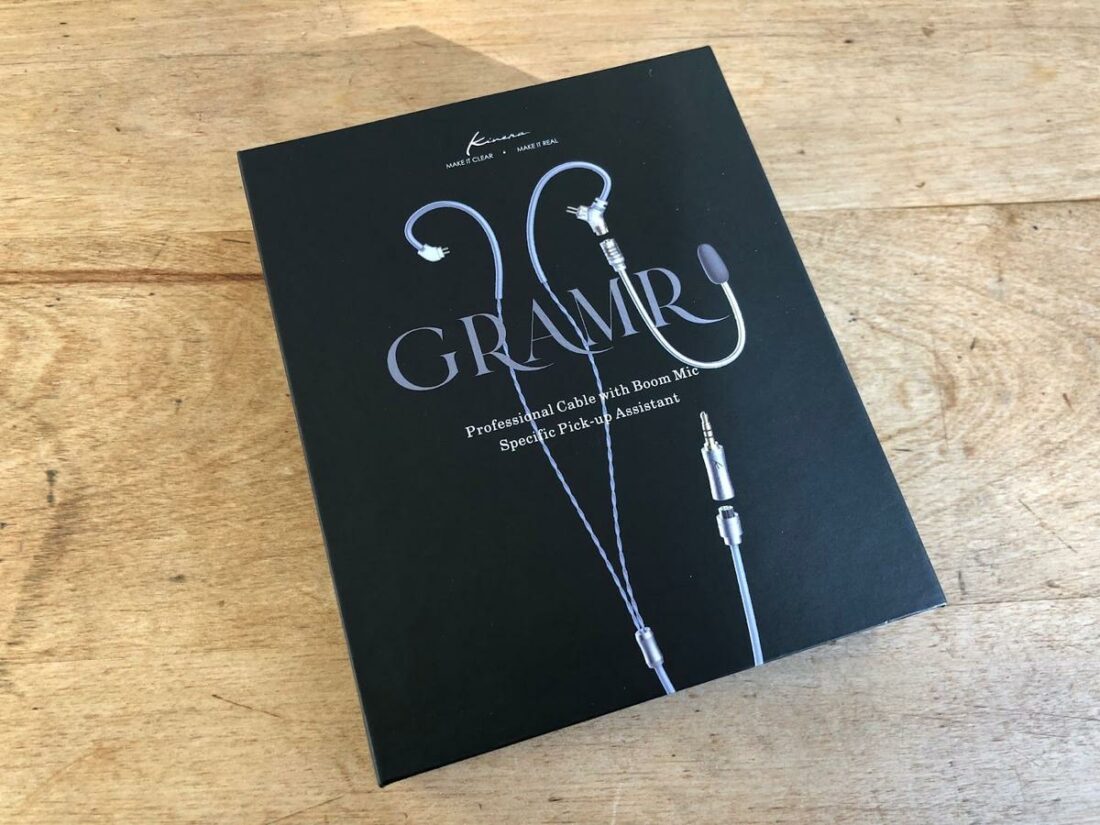
Kinera Gramr Cable
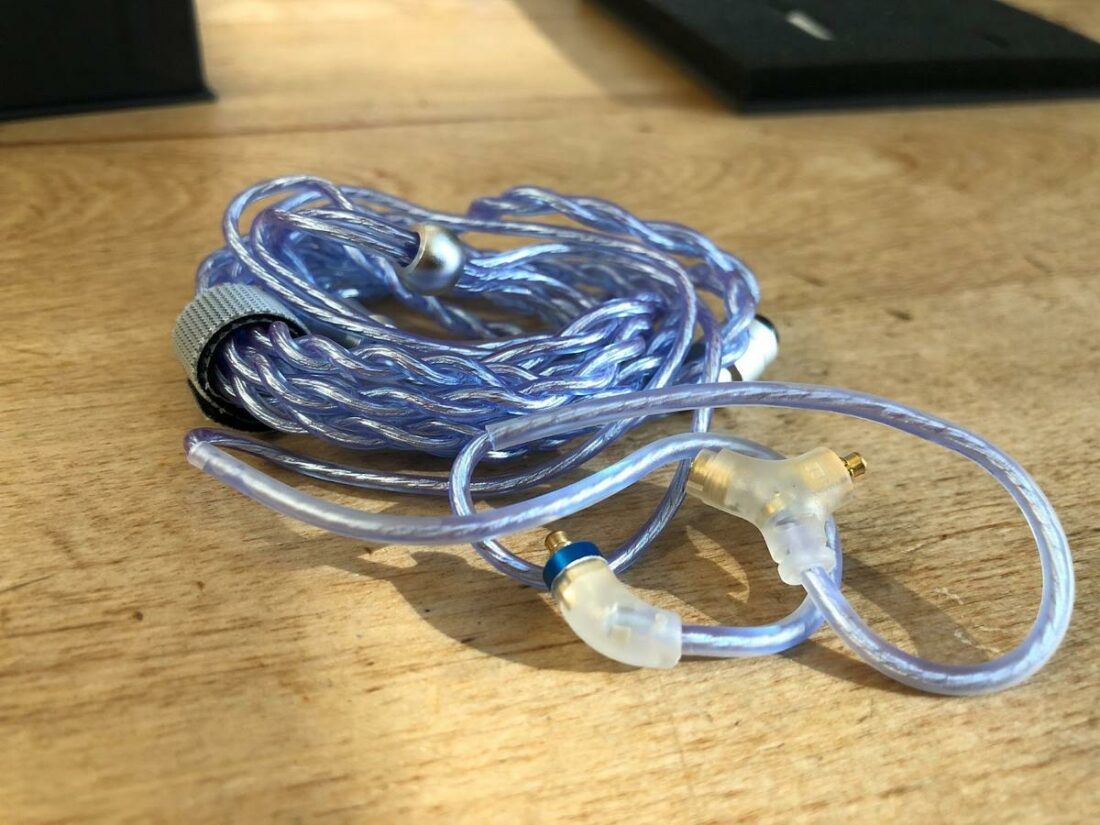
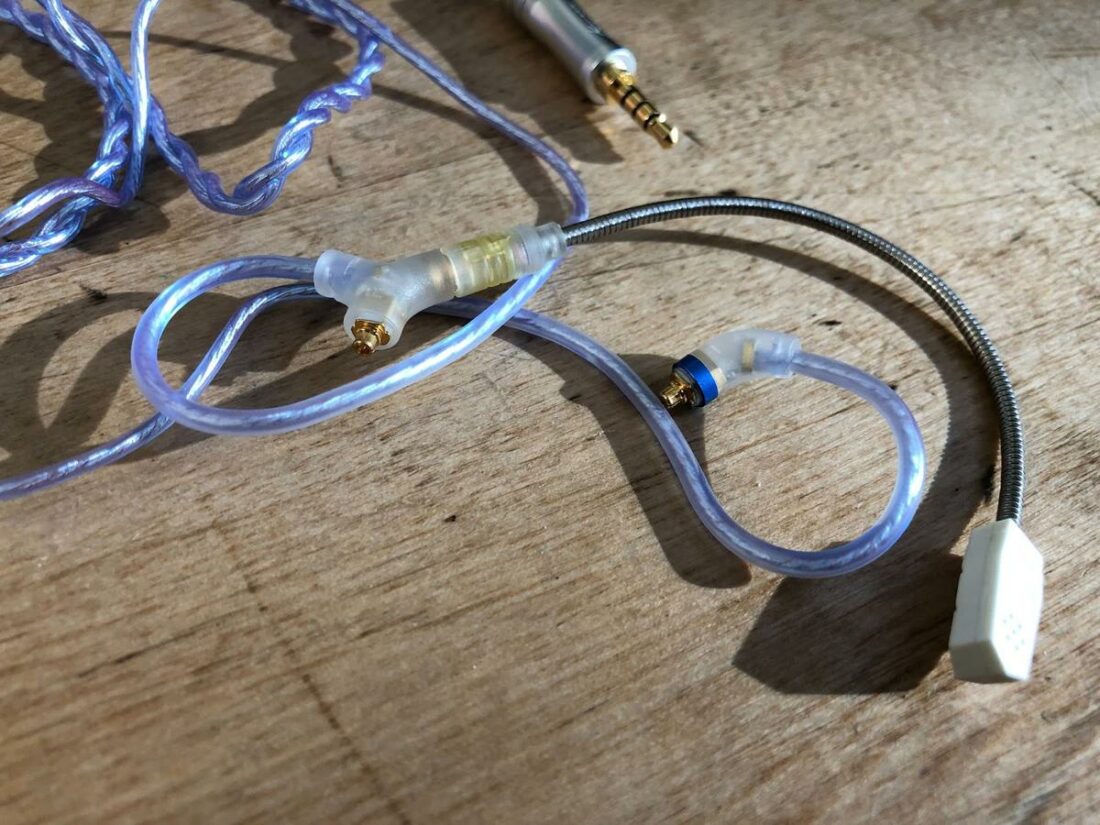
Once I learned of the MMCX Kinera Gramr cable, I knew that this would answer the question of how to use the Porta Pro for gaming. Intended for IEMs, the Gramr differs from all the other cables out there by including a detachable omni directional boom microphone.
Technical Specifications
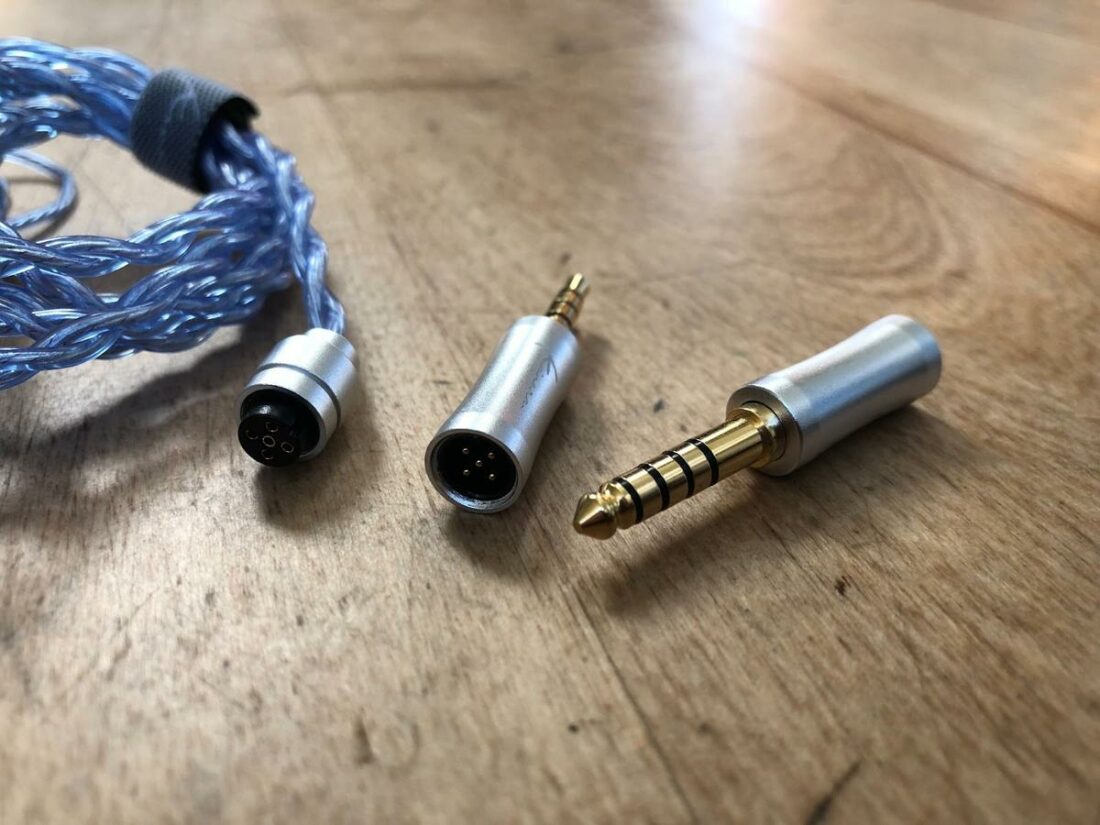
Material: 95 strands of 0.05mm silver-plated, high-purity OFC wires with 250D nylon Construction: 2-core twisted-braid cable structure with PVC outer coating Design: Modular with detachable termination plugs and detachable boom mic Headset Connector: 2-pin 0.78mm or MMCX Plugs: 4.4mm balanced, 3.5mm single ended Plug Material: Copper with gold plating Length: 150cm±2cm
Gramr Construction
The Gramr is built from 98 strands of 0.05mm silver-plated copper. A strand of braided nylon is added in for strength. Kinera claims that this construction “…has higher purity and better conductivity but also reduces the loss in the application of audio signal transmission, presenting a delicate and pure sound quality.” The 1.5m, dual twisted-braid PVC-wrapped cable is available in translucent black and blue. It is soft, supple, and non-microphonic. Available in both 0.78mm 2-pin and MMCX versions, the Gramr comes with swappable 3.5mm single-ended and 4.4mm balanced plugs plated in 24K gold. Apple Lightning and USB-c connectors are available as well. Now that’s flexibility! The connectors are attractive and well-made, and constructed from matte-finished, anodized aluminum. Of note, the modular jack is shallow – only about 2 mm deep – and it’s only pressure fit with no retaining mechanism. Expect to occasionally inadvertently pull the connection apart with use. Unless you grasp the plug, you can easily pull the modular connection apart rather than unplugging it from the source.
Boom Microphone
The 125mm long boom microphone is constructed from a flexible metal band that retains its shape. On one end is a small white plastic nub that contains the omnidirectional microphone. The other end has a single male MMCX plug that clips into the right-side headphone cup connector. The boom length is perfect to unobtrusively position the microphone near the corner of my mouth, and the entire package is svelte and elegant. Included in the box are a couple of foam pieces that fit over the microphone and function as a windscreen to minimize breath sound pickup. Frankly, the microphone quality surprised me. It sounds genuinely excellent, clearly picking up my voice and putting some expensive wireless headphone microphones to shame.
Microphone Recordings
Remove the Ear Guides from the Cable
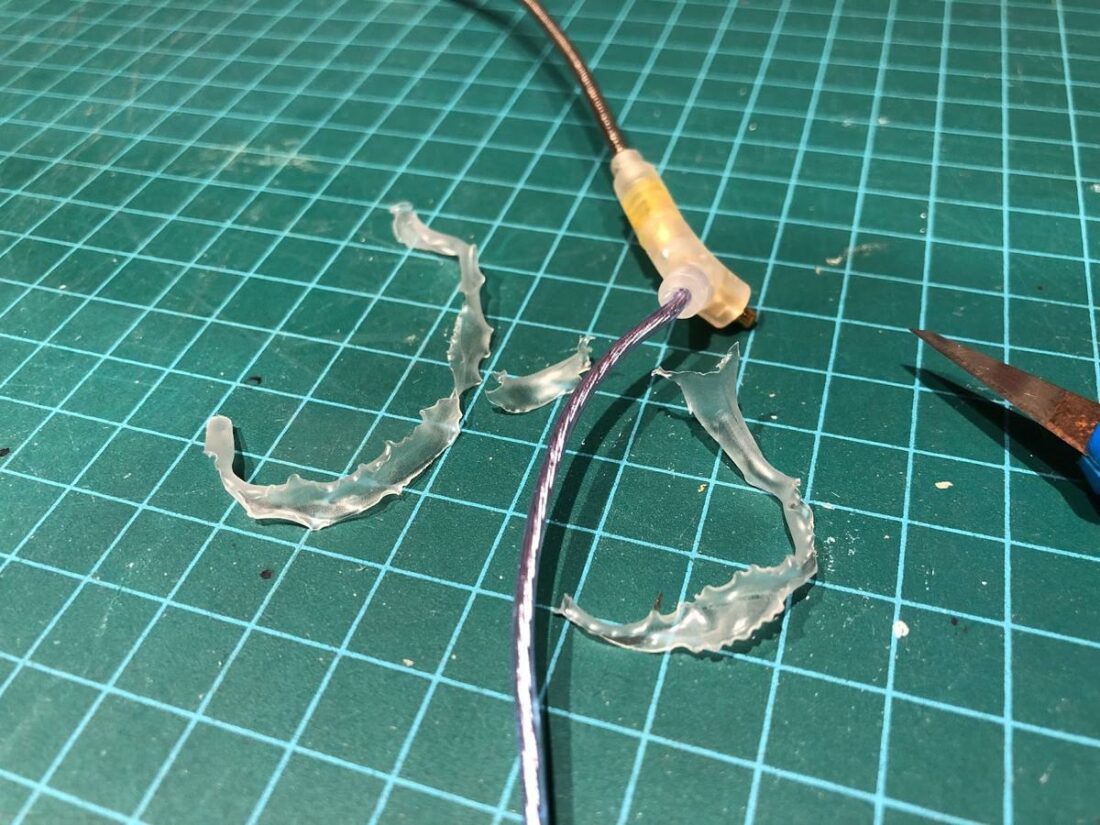
Since the Gramr cable is intended for IEMs, it has a couple of 6 cm long rubber heat-shrink type coatings that curve the wire near the MMCX plugs. They are there so that the cable naturally fits over and around the ear to hold the IEMs in place. The ear guides need to go since we’re going to use the cables with the downwards-facing sockets on the Porta Pro. To remove the rubber guide, very carefully insert the tip of an X-acto blade facing outwards between the wire and the coating. Cut a small slit until you have the beginning of a split in the coating. Then holding the coating and wire in each hand, gently pull apart to further tear the coating along the split. It will likely be necessary to use the knife again, as the rubber will tear off as you go. Remove the rubber coating as close to the MMCX connector as you can go, and use the knife to clean up any remaining bits. The cable will now hang fairly straight from the sockets.
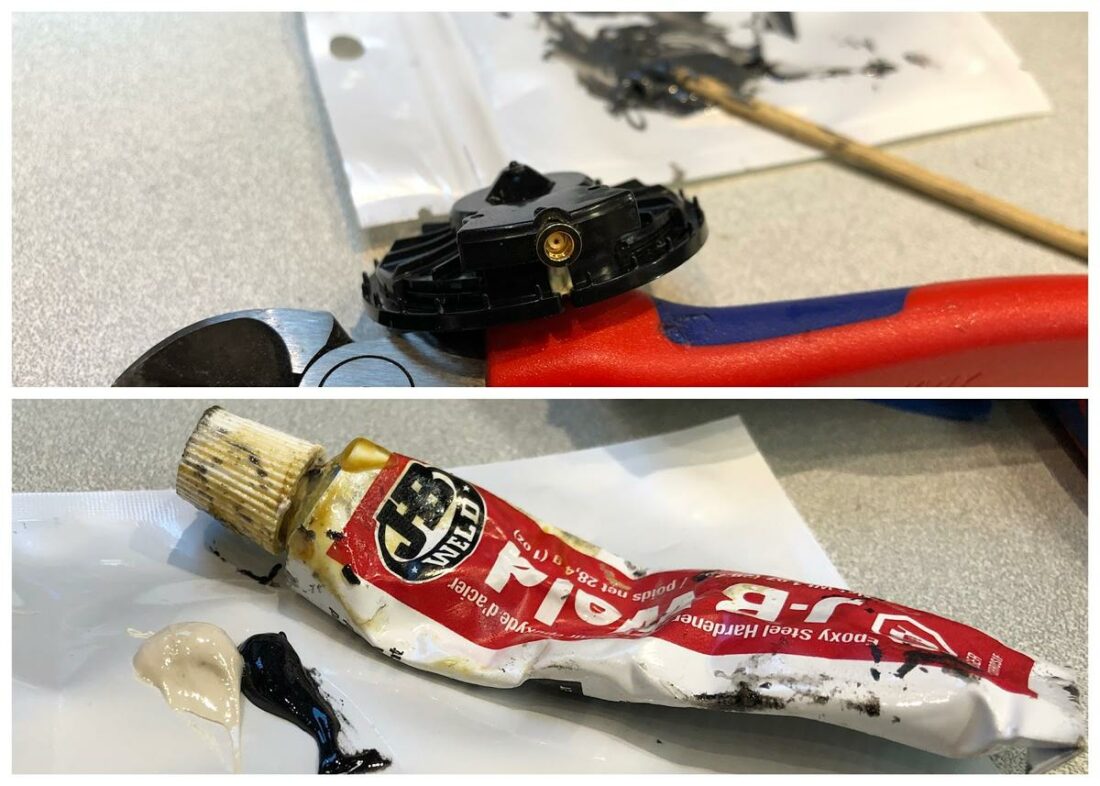
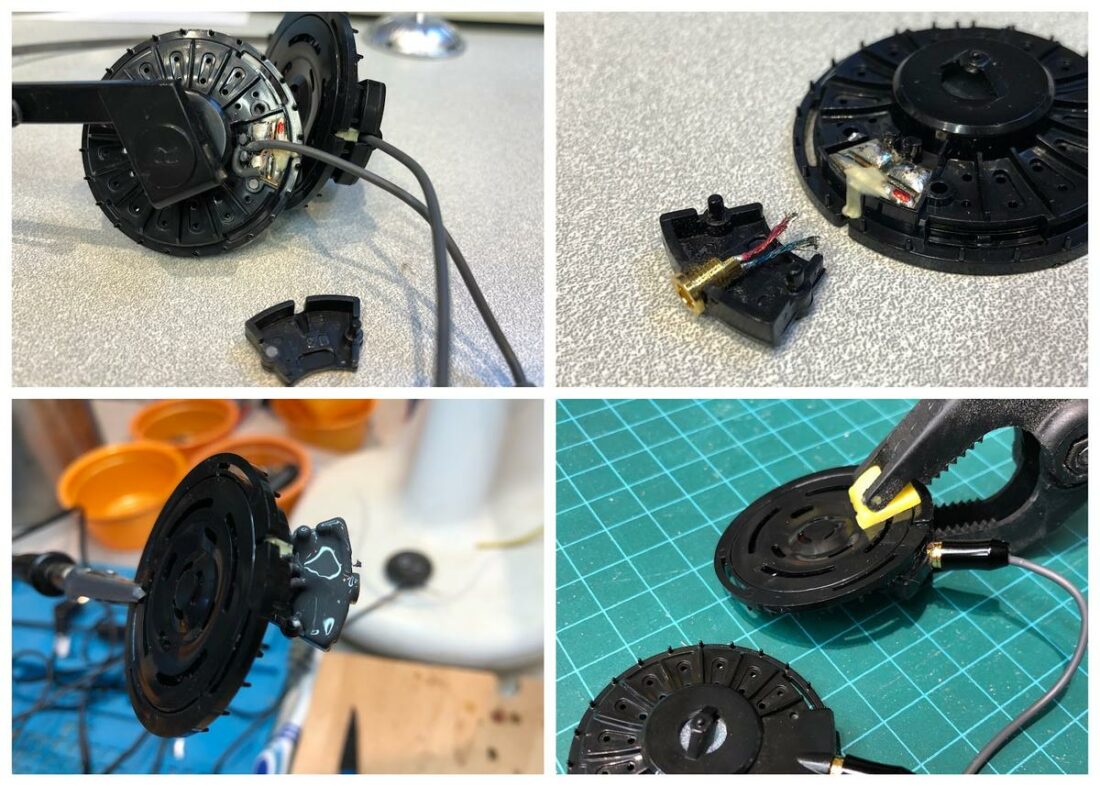
How to Add MMCX Sockets to the Porta Pro
Tools needed
Soldering iron + solder Tiny flat-head screwdriver or spudger Epoxy Dremel rotary tool with a small grinder bit X-acto knife or break-off utility knife Very thin wires MMCX sockets Small clamp or clothespin Toothpick Lysol wipe
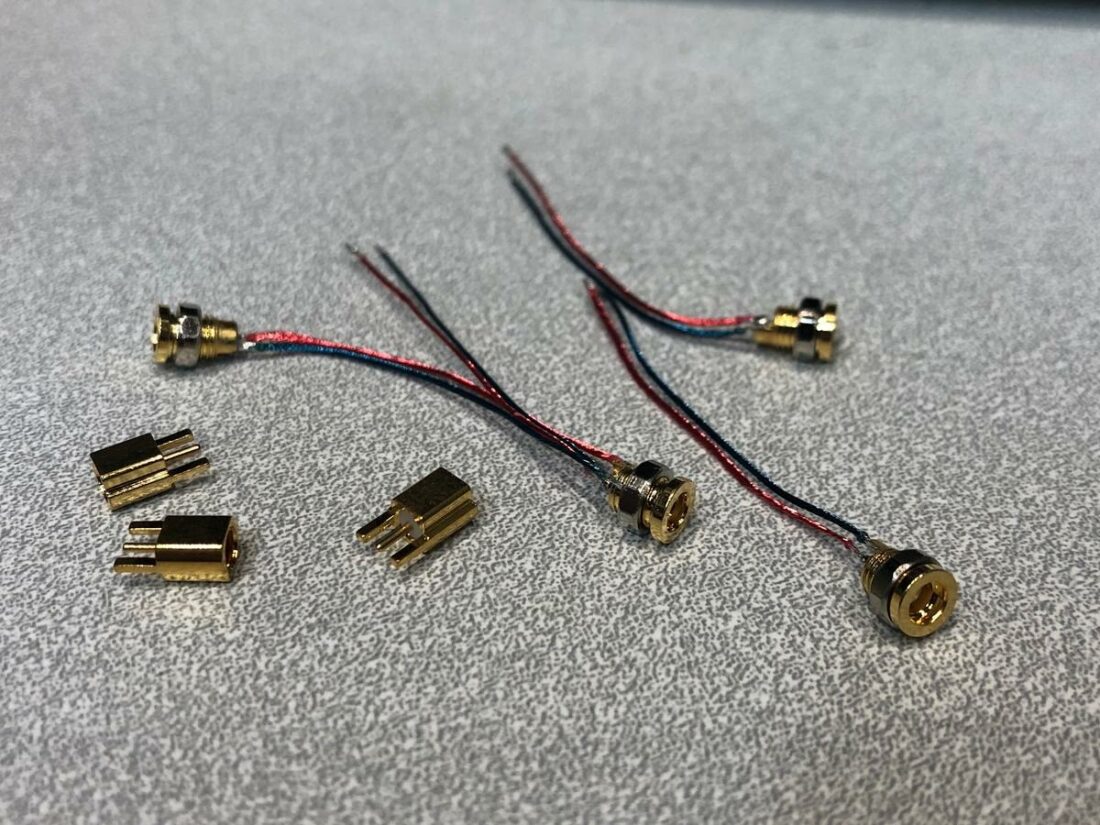
There are two basic styles of female MMCX sockets readily available. One is a circuit board pin style, while the other is a threaded socket. Neither can be attached as intended on the Porta Pro, but both can work well with a liberal application of epoxy to hold things together.
Steps
Where to Buy
Koss Porta Pro
Kinera Gramr cable
Yaxi pads
Conclusion
I love DIY. Sure, the process usually voids warranties, but it allows the user to customize something into exactly what they want. To elevate a humble product into something phenomenal. To make use of gear that may be gathering dust. In stock form, the Porta Pro are great. After mods, the affordable Porta Pro transform into something even better. Now with the Kinera Gramr cable, the Porta Pro can fill another niche as a gaming headset in addition to music listening. The Gramr is a remarkable cable. Its price means it isn’t an insignificant investment for this pair of headphones. But it is the ultimate upgrade – at least when paired with a pair of Yaxi ear pads. The Gramr offers flexibility above all else. Removable boom mic. Modular balanced and single-ended connectors. USB-c and Lightning available upgrades. My only nitpick is the modular connection, which would benefit from a more secure link than friction fit. Aside from that, the cable looks and feels great, and most importantly for gamers, the microphone is terrific. If you are on the fence about modifying your Porta Pros, just do it. Order the Yaxi pads and the Kinera Gramr cable, and you can have the ultimate pair of these classic headphones.