Also, companies like to maintain a decorum by restricting users to stop changing color and appearance in Windows 10. Once the setting is enabled, you can see an alert message saying “Some settings are managed by your organization” when you try to change color and appearance. So without wasting any time let’s see How to Prevent Changing Color and Appearance in Windows 10 with the help of the below-listed tutorial.
Prevent Changing Color and Appearance in Windows 10
Make sure to create a restore point just in case something goes wrong.
Prevent Changing Color and Appearance in Windows 10 Method 1: Stop Changing Color and Appearance in Windows 10 using Gpedit.msc Method 2: Prevent Changing Color and Appearance in Windows 10 using Registry
Method 1: Stop Changing Color and Appearance in Windows 10 using Gpedit.msc
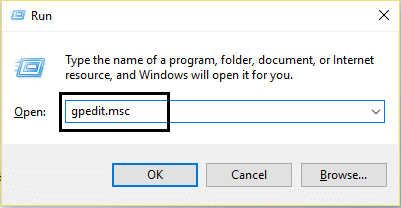
Note: This method won’t work for Windows 10 Home Edition users, instead use Method 2. 1.Press Windows Key + R then type gpedit.msc and hit Enter to open Group Policy Editor.
2.Now navigate to the following policy settings: Local Computer Policy > User Configuration > Administrative Templates > Control Panel >Personalization 3.Make sure to select Personalization then in the right-window pane double-click on “Prevent changing color and appearance“.
4.Next, to prevent chaning color and appearance in Windows 10 checkmark “Enabled” then click Apply followed by OK.
5.In future, if you need to allow changing color and appearance then checkmark Not Configured or Disabled. 6.Close Local Group Policy Editor then restart your PC. 7.To test if this setting work, press Windows Key + I to open Settings. 8.Click on Personalization then from the left-hand menu select Color. 9.Now you will notice that “Choose your color” will be greyed out and there will be a notice in red which says “Some settings are managed by your organization“.
10.That’s it, users are prevented from changing color and appearance on your PC.
Method 2: Prevent Changing Color and Appearance in Windows 10 using Registry
1.Press Windows Key + R then type regedit and hit Enter to open Registry Editor.
2.Navigate to the following registry key: HKEY_CURRENT_USER\Software\Microsoft\Windows\CurrentVersion\Policies\System 3.Right-click on System then select New > DWORD (32-bit) Value.
4.Name this newely created DWORD as NoDispAppearancePage then double-click on it to edit its value.
5.In the Value data field type 1 then click OK to prevent changing color and appearance in Windows 10. 6.Now follow the exact same steps to create the DWORD NoDispAppearancePage in the following place: HKEY_LOCAL_MACHINE\SOFTWARE\Microsoft\Windows\CurrentVersion\Policies\System
6.If in future you need to allow changing color and appearance then simply right-click on the NoDispAppearancePage DWORD and select Delete.
7.Close Registry Editor then reboot your PC to save changes. Recommended:
Change Default Action when you close your Laptop Lid 4 Ways to Change Date and Time in Windows 10 Fix Click here to enter your most recent credential Notification Synchronize Windows 10 Clock with an Internet Time Server
That’s it you have successfully learned How to Prevent Changing Color and Appearance in Windows 10 but if you still have any queries regarding this tutorial then feel free to ask them in the comment’s section.