What is Slipstreaming?
Slipstreaming is a process of adding Windows update packages into the Windows setup file. In short, it is the process of downloading Windows updates and then building a separate Windows installation disk which includes these updates. This makes the update and installation process more efficient and faster. However, using the slipstreaming process can be quite overwhelming. It may not be as beneficial if you do not know the steps to be performed. It may also cause more time than the normal way of updating Windows. Performing slipstreaming without prior understanding of the steps may also open risks for your system.
What is Slipstreaming? How to Slipstream Windows 10 Installation (GUIDE) #1. Check all the Installed Windows Updates & Fixes #2. Download Available Fixes, Patches & Updates #3. Download Windows 10 ISO #4. Load Windows 10 ISO data files in NTLite #5. Load Windows 10 Fixes, Patches & Updates #6. Slipstream Windows 10 Updates to an ISO file
Slipstreaming proves very beneficial in a situation where you need to install Windows and its updates on multiple computers. It saves the headache of downloading updates over and over and also saves ample amount of data. Also, the slipstreaming versions of Windows allow you to install a fresh up to date Windows on any device.
How to Slipstream Windows 10 Installation (GUIDE)
But you do not need to worry a bit because, in this article, we are going to tell you everything that you need to know in order to perform Slipstream on your Windows 10. Let us get on with the first requirement:
#1. Check all the Installed Windows Updates & Fixes
Before working on updates and fixes, it is better to know what all is going on with your system at the moment. You must have a knowledge of all patches and updates installed in your system already. This will also help you check the updates along the whole slipstreaming process. Search for Installed Updates in your Taskbar search. Click on the top result. The installed updates window will open from the Programs and Features section of the system settings. You can minimize it for the time being and move to the next step.
#2. Download Available Fixes, Patches & Updates
Generally, Windows downloads and installs updates automatically, but for the slipstream process of Windows 10, it needs to install files of individual update. However, it is very complex to search for such files in the Windows system. Therefore, here you can use the WHDownloader. 1. First of all, download and install the WHDownloader. When installed, launch it. 2. When launched, click on the arrow button on the top left corner. This will fetch you a list of updates that are available for your device.
3. Now choose the version and build a number of your Operating System.
4. Once the list is on the screen, select all of them and click ‘Download’.
You can also use a tool called WSUS offline update instead of WHDownloader. Once you get the updates downloaded with their installation files, you are ready to move to the next step.
#3. Download Windows 10 ISO
In order to Slipstream your Windows updates, the primary requirement is to download the Windows ISO file on your system. You can download it through the official Microsoft Media Creation tool. It is a standalone tool by Microsoft. You do not need to perform any installation for this tool, you only need to run the .exe file, and you are good to go. However, we strictly prohibit you from downloading the iso file from any third-party source. Now when you have opened the media creation tool:
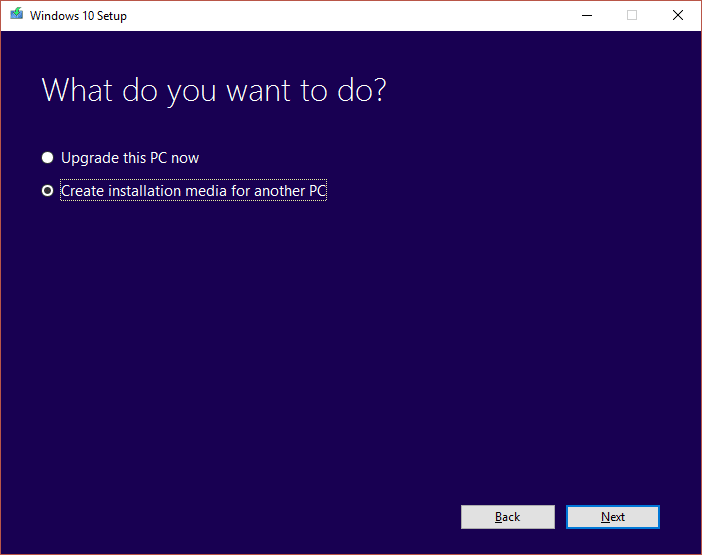
You will be asked if you want to ‘Upgrade the PC now’ or ‘Create installation media (USB Flash drive, DVD or ISO file) for another PC’.
Choose ‘Create installation media’ option and click Next.
Now select your preferred language for further steps.
You will now be asked the specifications of your system. This will help the tool find an ISO file compatible with your Windows computer.
Now that you have chosen the language, edition, and architecture, click Next.
Since you have chosen the installation media option, you will now be asked to choose between ‘USB flash drive’ and ‘ISO file’.
Select the ISO file and click Next.
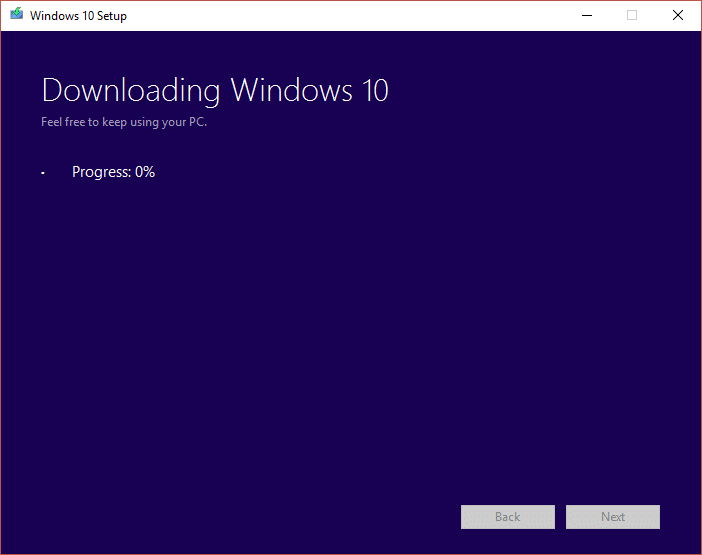
Windows will now start downloading the ISO file for your system. Once the download has been finished, navigate through the file path and open Explorer. Now go to the convenient directory and click Finish.
#4. Load Windows 10 ISO data files in NTLite
Now that you have downloaded and installed the ISO, you need to modify the data in ISO file according to the compatibility of your Windows computer. For this, you will need a tool called NTLite. It is a tool from Nitesoft company and is available at www.ntlite.com for free. The installation process of NTLite is same as that of ISO, double click on the exe file and follow on-screen instructions to complete the installation. First of all, you will be asked to accept the privacy terms and then specify the install location on your computer. You can also opt for a desktop shortcut.
Now that you have installed the NTLite tick the Launch NTLite checkbox and click Finish.
As soon as you launch the tool, it will ask you about your version preference, i.e., free, or paid version. The free version is fine for personal use, but if you are using NTLite for commercial use, we recommend you buy the paid version.
The next step will be the extraction of files from the ISO file. Here you need to go to the Windows File Explorer and open the Windows ISO file. Right-click on the ISO file and select Mount. The file will be mounted, and now your computer treats it as a physical DVD.
Now copy all the required files to any new directory location on your hard disk. This will now work as a backup if you make a mistake in further steps. You can use that copy if you want to start the processes again.
Now come back to NTLite and click on the ‘Add’ button. From the dropdown, click on Image Directory. From the new dropdown, select the folder where you copied the content from ISO.
Now click on the ‘Select Folder’ button to import the files.
When the import is complete, you will see a Windows Editions list in the Image History section.
Now you need to choose one of the editions to modify. We recommend you go with the Home or Home N. The only difference between Home and Home N is the media playback; you do not need to worry about it. However, if you are confused, you can go with the Home option.
Now click on the Load button from the top menu and click OK when a confirmation window to convert the ‘install.esd’ file into WIM format appears.
When the image loads, it will be shifted from the history section to the Mounted Images folder. The grey dot here will turn to green, indicating the successful loading.
#5. Load Windows 10 Fixes, Patches & Updates
From the left-hand side menu click on Updates.
Click on the Add option from the top menu and select Latest Online Updates.
Download Updates window will open up, select the Windows build number you want to update. You should choose the highest or the second-highest build number for the update.
Note: In case you are thinking to choose the highest build number, first, make sure that the build number is live and not a preview of yet to be released build number. It is better to use live-build numbers instead of previews and beta versions. 4. Now that you have selected the most appropriate build number, select the checkbox of every update in the queue and then click on the ‘Enqueue’ button.
#6. Slipstream Windows 10 Updates to an ISO file
The next stage here is to apply all the changes made. It would help if you switch to the Apply tab available on the left side menu.
Now select the ‘Save the image‘ option under the Saving Mode section.
Navigate to the Options tab and click on the Create ISO button.
A pop-up will appear where you need to choose the file name and define the location.
Another ISO label pop-up will appear, type the name for your ISO image and click OK.
When you have completed all the above-mentioned steps, click on the Process button from the top left corner. If your antivirus shows a warning pop-up, click No, and proceed. Otherwise, it may slow down further processes.
Now a pop-up will ask to apply the pending changes. Click Yes to confirm.
When all the changes are applied successfully, you will see Done against each process in the progress bar. Now you are ready to use your new ISO. The only step remaining is to copy the ISO file on a USB drive. The ISO may be of several GBs in size. Therefore, it will take some time copying it to the USB.
Now you can use the USB drive to install that slipstream Windows version. The trick here is to plug the USB before booting the computer or laptop. Plug the USB in and then press the power button. The device may begin downloading the slipstreamed version on its own, or it may ask you if you want to boot using the USB or normal BIOS. Select USB Flash Drive option and proceed. Once it opens up the installer for Windows, all you need to do is follow the given instructions. Also, you can use that USB on as many devices and as many times as you want. So, this was all about the Slipstreaming process for Windows 10. We know it is a bit complex and tedious process but let us look at the big picture, this one-time effort can save so much of data and time for further update installations in multiple devices. This slipstreaming was relatively easy in Windows XP. It was just like copying files from a compact disk to the hard disk drive. But with the changing Windows versions and new builds kept coming, slipstreaming changed as well. Recommended:
What is the USO Core Worker Process or the usocoreworker.exe? How to Change Fonts on Android Phone (Without Rooting) How to See Recent Downloads in Google Chrome
We hope this article was helpful and you were able to Slipstream Windows 10 Installation. Also, it would be great if you did not face any difficulty while following the step-by-step guide for your system. However, if you face any issue, we are right here ready to help. Just drop a comment mentioning the issue, and we will help.


![]()