You can easily use remote desktop by just setting up a port forwarding rule on your router. But what happens if you don’t use a router to access the internet? Well, in that case, you need to change the remote desktop port in order to use the remote desktop feature.
The default remote desktop port through which this connection happens is 3389. What if you want to change this port? Yes, there are some situations when you prefer to change this port to connect with a remote computer. Since default port is known to everybody so hackers sometimes can hack the default port to steal the data such as login credentials, credit card details, etc. To avoid these incidences, you can change the default RDP port. Changing the default RDP port is one of the best security measures to keep your connection secure and access your PC remotely without any problem. So without wasting any time let’s see how to change the Remote Desktop Port (RDP) in Windows 10 with the help of the below-listed guide.
How to Change Remote Desktop Port (RDP) in Windows 10
Make sure to create a restore point just in case something goes wrong.
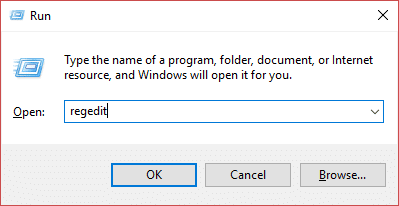
Open registry editor on your device. Press Windows key + R and type Regedit in the Run dialogue box and hit Enter or Press OK.
Now you need to navigate to the following path in the registry editor.
Under the RDP-TCP Registry key, locate the Port Number and double-click on it.
In the “Edit DWORD (32-bit) Value” box, switch to Decimal value under Base.
Here you will see the default port – 3389. You need to change it to another port number. In the below image, I have change the port number value to 4280 or 2342 or what number you wish. You can give any value of 4 numbers.
Finally, Click OK to save all settings and Restart your PC. Also Read: Fix Remote Desktop Cannot Connect to the Remote Computer Now once you have changed the default RDP port, its time you should verify the changes before using the remote desktop connection. It is important to ensure that you changed the port number successfully and can access your remote PC via this port. Step 1: Press Windows key + R and type mstsc and hit Enter.
Step 2: Here you need to type your remote server’s IP address or hostname with the new port number then click on the Connect button to start the connection with your remote PC.
You can also use login credentials to connect with your remote PC, just click on Show options at the bottom then enter your username and password to start the connection. You can save the credentials for further usage.
Also Read: Fix The Registry editor has stopped working So it is recommended that you Change Remote Desktop Port (RDP) in Windows 10, by doing so you are making it difficult for hackers to access your data or credentials. Overall, the above-mentioned method will help you to change Remote Desktop Port easily. However, whenever you change the default port, make sure to that the connection is established properly.